Are you an aspiring indie game developer looking to create a game like Stardew Valley or Harvest Moon? Have you considered using the GoDot game engine to bring your vision to life? GoDot is an open-source game engine that provides a user-friendly interface and powerful features to help you create engaging games. In this tutorial, we will guide you through the process of making a Stardew Valley clone in GoDot.
Stardew Valley, developed by ConcernedApe, is a farming simulation game that has captured the hearts of gamers worldwide. In this game, players inherit a small farm and must work to build it up by planting crops, raising livestock, and interacting with the community. The game’s charming graphics, soothing music, and engaging gameplay have made it a fan favorite and a commercial success.
Creating a game like Stardew Valley may seem like a daunting task, but with the right tools and techniques, it is achievable. GoDot is a powerful game engine that can help you create a game that is both visually stunning and fun to play. In this tutorial, we will cover everything you need to know to get started, from setting up your project in GoDot to programming the gameplay mechanics.
Whether you’re an experienced game developer or a newcomer to the world of game development, this tutorial will provide you with the knowledge and skills you need to create a Stardew Valley clone in GoDot. By the end of this tutorial, you will have a solid understanding of how to use GoDot to create engaging games that will captivate players.
So, if you’re ready to embark on a journey to make your own Stardew Valley clone, read on!
1.0 Scenes Hierarchy
Before we even start creating gameplay elements of the game, it’s important to choose adequate scene hierarchy.
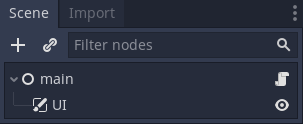
In this game two scenes will always be presented and we will use them to nest all other instances of the scenes.
The first one is “main” scene, and it’s actually just Node – from Godot’s built in scenes. For now we will attach an empty script to it.
And the second one will be CanvasLayer scene, instanced as sub-child of main, and we will name it UI.
Main scene will be starting point for our game and also will be used to control the entire game when and if needed. For example, here we can set which scene will be instanced first, use it to mute sounds or delete saves.
In other hands, UI scene will be used to manage all user interface elements, like text popups, bars, buttons, etc., and it would also be”easily” controllable by main.
2.0 Global Script
Now when our base scenes are created we are going to make so that they are fastly accessible from anywhere in the game – and this is where Godot Autoload becomes useful.
First let’s create an script and name it “Global” and place it as autoloads in Project Settings.
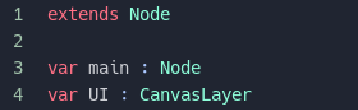
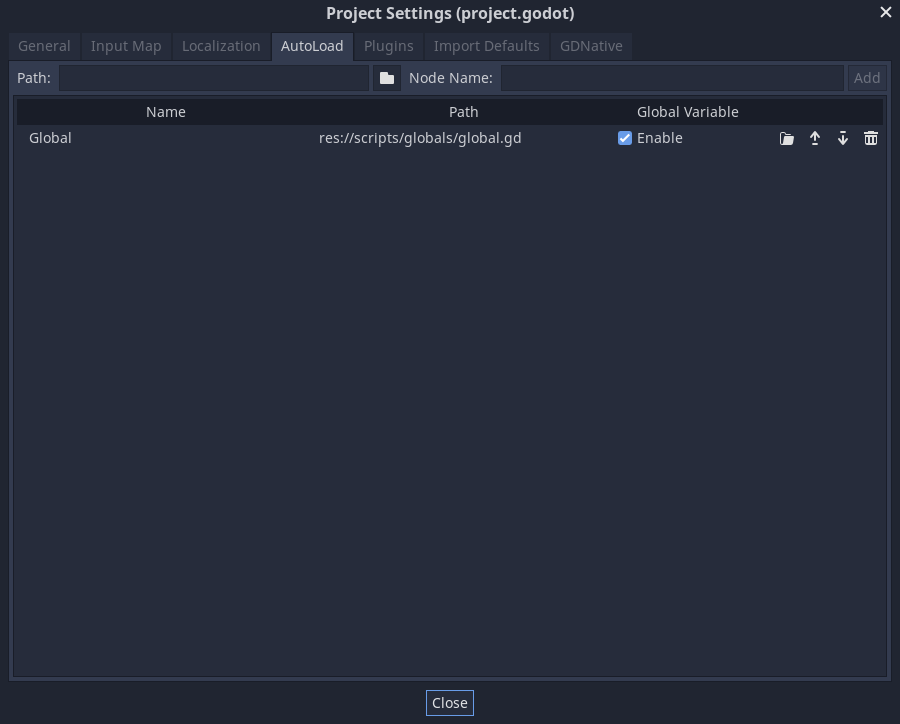
Autoloads are loaded before anything else, which means that our “main” and “UI” can define themself as variables inside the “Global” once when instanced.
This we are going to do from within the “main” script.
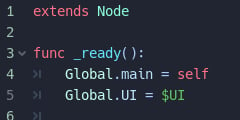
From now on, whenever we need to access one of these scripts, we can simply type: Global.[variable – scene name] and then call for an action within that node.
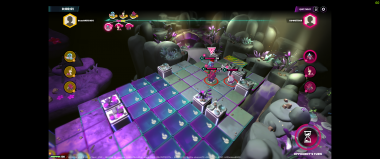
3.0 In/Out of the Game World
Gameplay loop is groundbreaking point for every game, however – before we go forward to create player, trees and other game object, we are going to setup “door” for entering the gaemplay world and exiting to the main menu.
Afterwrds, this same world going to be populated with in-game objecs and events.
So let’s create some scenes, we are going to need:
– Main Menu (Control)
– Gameplay User Interface
– Pause Menu (Control)
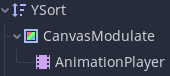
– World (YSort)
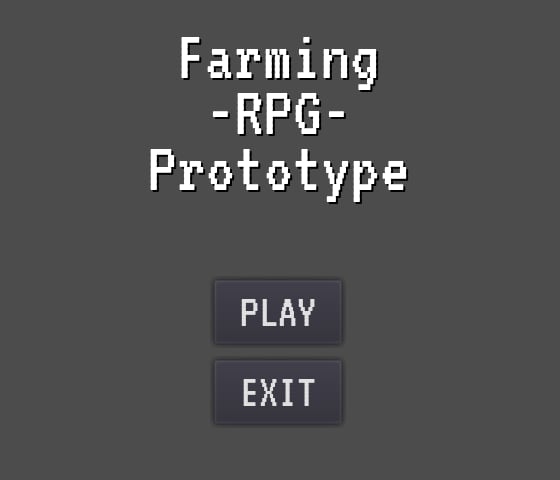
(Consisted of Game Name (Label) and two Buttons: Play and exit)
Remember how we define shortcuts for accessing nodes “main” and “UI”, well – since now we have an “ui” node (Main Menu) wich will be instanced as child of base UI, we are going to add shortcut for it too using same input as before.
It’s important not to confuse “UI” with “ui”!
“UI” is base node for all ui’s – think about it as place where every other ui element will be instanced and deleted. While “ui” is usually and larger ui node, like Main Menu, user interface during gameplay, options panel, etc.
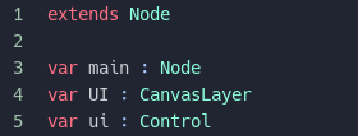
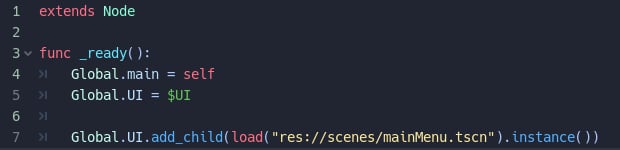
After adding it, our “Global” script will look like this:
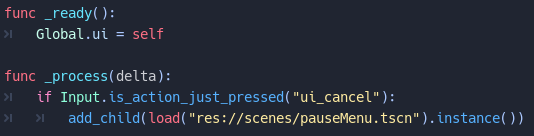
To complete the circle we will attach script to the “ui” node and define itself as Global’s ui, just as we done it before for “main” and “UI”.
For “Gameplay User Interface” we are going to use an empty node now and it’s script should look like this:
See how both “Main Menu” and “Gameplay User Interface” are defining itself as Global’s ui?!
That’s because there can be only one active “main ui” element – when we are in “main menu”, there will be no gameplay so “Gameplay User Interface” does not need to exist.
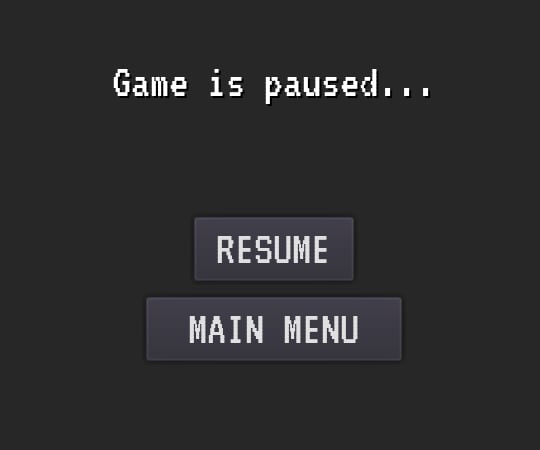
(Consisted of Pause Hint (Label) and two Buttons: Resume and Main Menu)
Let’s talk now about “Pause Menu” which appears to little darker than “Main Menu”.
Reason for this is ColorRect node nested within it with base black color and lower alpha value in order to make simple “dark” effect when [ESCAPE KEY] is pressed during gameplay and game is paused.
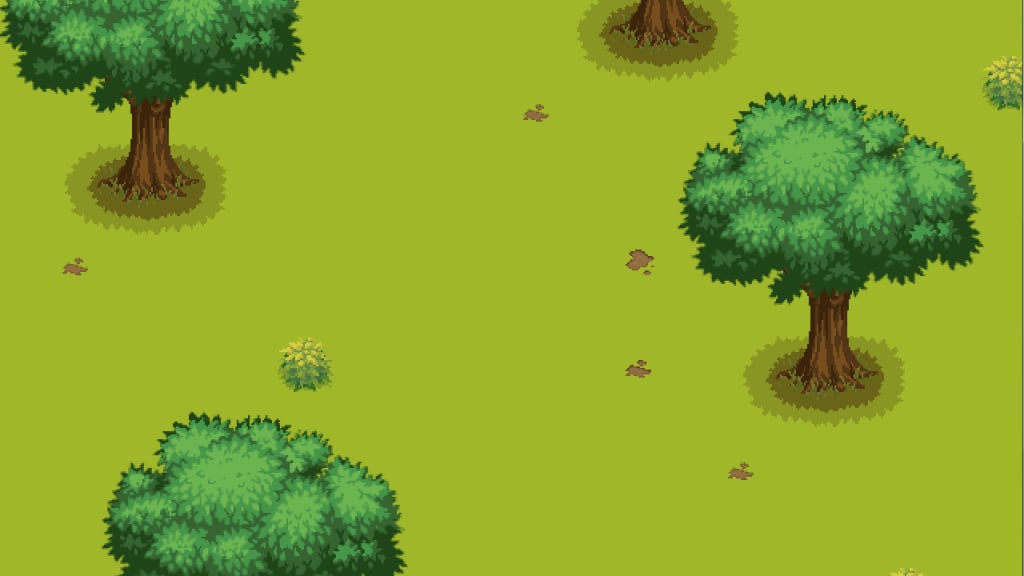
The only missing node for “in and out” of the game world is world itself!So let’s create one starting with new YSort scene.
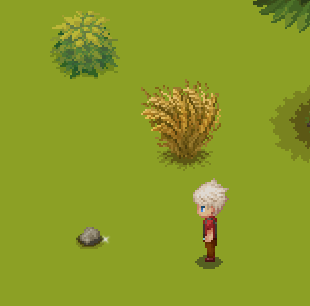
For terrain elements we are going to use TileMap and our testing objects will be trees and shrubs (StaticBody2D with children Sprite and CollisionShape2D).
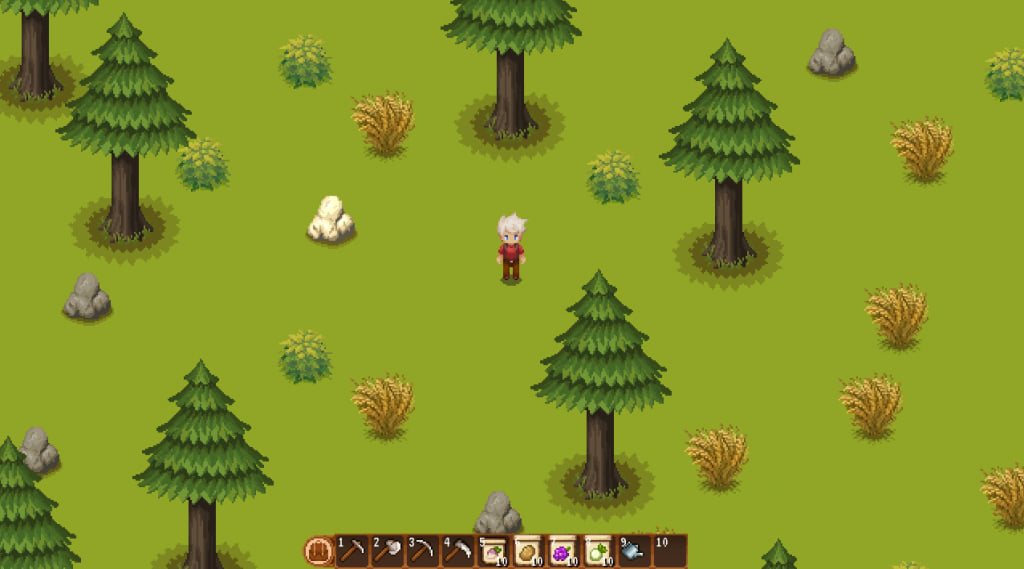
Once when we are done the world should look like this:
World will also be defined in “Global” script as world variable so that we can access it from anywhere too.
Now, when all needed scenes are created we can go forward and using Godot signals initialize scene instancing.
First our “Main Menu” will be instanced as soon as game starts. We are going to do this in “_ready” function in the “main” node.
Using the same instance method we are going to call for transition to the game world, gameplay user interface and releasing of main menu by pressing button “Play” in “Main Menu”.
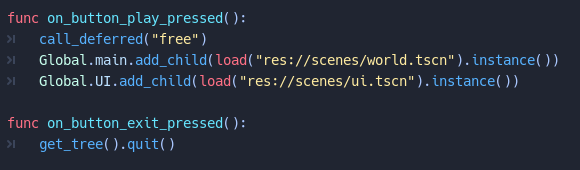
As shown on the script image – button “Exit” have single purpose, to quit the game.
So here we are, world and gameplay user interface are up and running!
And currently active ui (gameplay user interface) allow us to call for “Pause Menu” which will allow us further to use button “Main Menu” to go back where game initialy starts.
Day and Night Cycle
Making day and night cycle could seems to be a complex process, while in its core it’s just darkening and brightening visible game world as shown in the image below.

In Godot we can simply attach an Canvas Modulate scene to the our world scene.
Place an AnimationPlayer node to it – and animate “color” property of it’s parent with three points.
For this game color transitions looks like this:
First point: Color(1.0, 1.0, 1.0 , 1.0)
Second point: Color(0.1, 0.1, 0.1, 1.0)
Third point: Color(1.0, 1.0, 1.0, 1.0)
This animations should loop and its speed can be adopted as our needs requires.
We can do this directly by playing with scene’s properties or via new script.
“Hotbar” – things at Your Fingertips
Probably the best way to fast switch between different items will be an bar with many slots in it.
So why not use one in this game…
This “UI” element during the gameplay will be most used one since player will constantly switching tools, seeds, etc.

So we should make sure that it works even faster by making so that keyboard number keys can be used to select certain slot.
By using ” _unhandled_key_input” we will attach every slot to the one key – from 1 to 0, however when shown via label in the game these numbers would go from 1 to 10 (as image above shows) since key for number 0 is the last one in the row on usual keyboard.
Only one slot can be selected at the time and we will use “self_modualte” property to mark it out with green color.
So every time we select new slot by pressing the key we will need to loop through all chilerns in the bar and check if they are not the one that is selected in order to change their “self_modualte” back to color white if they awere previously selected.
Items
There are many ways to represent in-game items.
For this one we are using Dictionary, so each item is unique dictionary in an global script called “Items”.
The structure of an item looks like in the image.
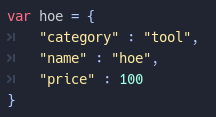
As game expands, items dictionary will grow, new “strings” will be added to it, such as: Type, variation, maximum quantity, level, bonus attribute, etc.
This is also nice way to be able to pull data of an item from outside source like Excel Document – some developers finds it more practical since everything can be sorted in the tables.
Remember, one dictionary is unique so every time when we create new item we need to use “duplicate” function in order to not make changes to the original.
In-game Objects (Destructibles)
Why have tools in the game if we can’t use them! So let’s explain how to make some crashable objects or as we call them destructibles.
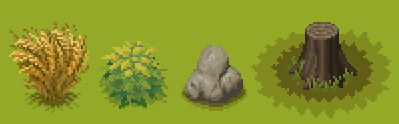
For this game we will need grass, bushes, rocks, and trees.
We will start by creating class named “Destructible” – every object mentioned above will be extension of this class. And since class will have variables “life” and “request Tool” – every object will have certain points of life and name of the tool required in order to be destructed or exploited.
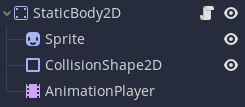
Image above shows scene for an destructible object.
It’s base is StaticBody2D node with childs: Sprite (object texture), CollisionShape2D (makes sure that player can’t walk over it) and AnimationPlayer (hurt aniamtion).
Tree is missing on the image above!
Yes, there is reason for this.
While grass, bush, rock and stump are one-time destructed, tree log (with leaf crown attached to it) is “two-time” destructible object.
Meaning that once when tree is cutted down, log will remain at the tree position – this makes tree kinda unique object regardign others.
But it is also oportunity to extend tools we need for this, for example – an common axe can be used to cut down tree but only an unique axe will be able to cut down remaining log.
Naturally in order to exploit shrub, stump and tree we will need an axe, for rocks pickaxe and for grass an reap. But tools aren’t the only thing that distinguishes objects from each another.
Every object in it’s script have “destroy” function which triggers when life points of an object reaches zero.
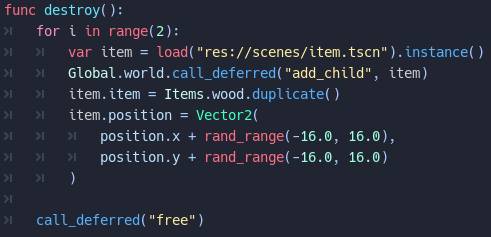
As image above shows, long will create two wood, tree will drop more than two, rocks will drop stones, etc. Now we can see why this function needs to be unique for each object – in short, we don’t want to allow player to loot grass from the rock.
To make sure that mine state can’t be triggered on the grass or reap state on the tree, we simply add every object to it’s group.
So grass object will be added to grass group, rock to the rock group etc.
If “hotslot” (currently selected slot in the main slot bars) is axe and we are about to try and hit an stone – hint popup will be called out from statment that checks if holded tool can be used to damage targeted object.
In-game Objects (Plants)
Similar to the destructibles, there are in-game object we call Plants – basically it’s seed that grows providing us certain fruit.
And as you can probably guess this fruit variable is defined in plant class to make sure that we loot potato from potato seed and not grow grape from an turnip.
Plants growing period is controlled by world in this game and image below shows how it’s code from world node works.
First step to accomplish this is to create an time as a child of world scene. For the sake of development and testing purpose we can easily change property of time time called “wait time” – to speed up or slow down the growth process.
Then time needs to be connected to its signal “timeout” wich will further allow us to apply changes when it triggers.
Player Animations
Usually animations are semi-hard and fun process for every developer since looking at the art can be more relaxing than looking at the code.
If you are one of these developers, well – you will plenty of playing with animations in this project.
In this game player uses different tools that requires parallel animations with different body parts, such as body, hair and especially arms wehre tools seems to be attached – at least that’s howit should work in the real world.
Dealing with all of this should not be big problem if we were not dealing with 2D game sorted by Y axis.
Our player can face four direction, which means that we have to code what Animated Sprites (we are using this node to create frames for player aniamtions) should be rendered in front or back.
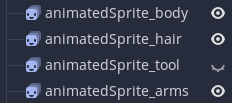
Four animatimation nodes means that we will have to control them separately in every state.
You might notice that Animated Sprite for tool is not visible, this is because tool is visible only during “working” states, like: Mining, cutting, etc.
Same node is one that needs to be manually coded to be rendered last when player facing north or Vector.UP direction.
Otherwise, tool will be shown in front wich does not make any sense
Hint Popup
In this game we will make hint scene using Label and AnimationPlayer nodes. Label will show wanted text and Animation Player will make it so that disappears over time.
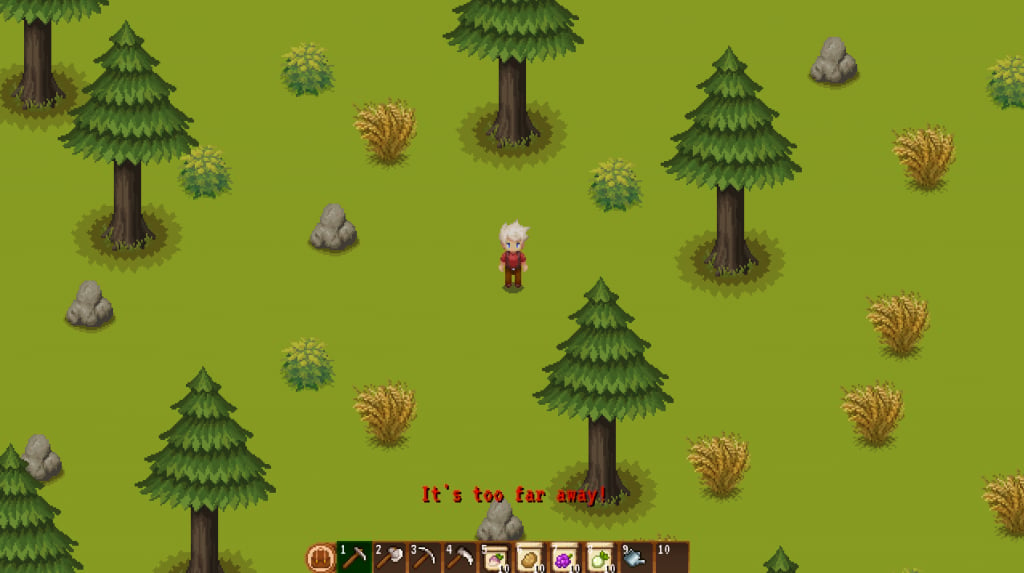
One thing that probably every player hates is where there is not enough output after failed attempt to trigger event in the game.
When we fail in such a thing the best thing that game can offer is fast output to tell us how something should be done or even if something we just accomplish.
Game’s “ui” node or gameplay user interface has function that will instance our hint scene as it’s child.
And if you remember “ui” is marked as global variable inside “Global” script so that we can acces it from anywhere in the game – in other words, we can call for “hint” scene whenever we need it.
Function for calling it also requires two arguments, the first one is text we want to show and the second one is RGB color in shape of Godot’s Color property.
Let’s explain now why this is handy. Hint can be warning and usually it is represented by red color.
But hint also can be something like “Quest Complited”! And since this is good thing we do not want to show it in red as this color for most players represent something bad.
Now is also good time for us to explain how to make sure not to instance two of the same menus, like character menu, inventory, skill tree, etc.
Our hint scene is not menu but we want to make sure that it can’t be instanced more than once at the time – otherwise hints would overlaps eachother and it would not be possible to read anything clear.
The simpliest solution we can use is to make sure that scene, in our case hint scene, is named “hintScene” on instancing and then make sure that every time we call for instancing function it checks if scene is already exist, in case “yes” it will close it or remove it in “hint” case before isntancing new hint.
Spark and Glow
Ever felt like you know exactly what to do it in the game?!
Designers are using different method to provide this feel to the player.
We will use two in this gama, one will be “spark” that will be shown around an “pickable” item (fruit or material) and “glow” that will point out an “interactable” object.
Spark is an Particles2D node, by playing with its properties we can adapt it to your needs. We made one that just blinks around, popup and hides nearby pickable item. Whenever we need to attach it to the object we just make an instance of it as child of that same object.
Glow have similar purpose as spark but it is little more complicated to create since different objects are represented by different textures.
In order to accomplish this we will be using node Light2D and this is how it works.
Destructibles class connects all object to signals: “mouse_entered” and “mouse_exited”.
Whenever mouse enters destructible’s collision shape an Light2D scene will be created as its child and texture path will be used to attach same texture to it so that there is no wrong overlap outside of the object.
This Light2D should be named for example “Light2D” so that we can find it via string upon mouse exiting the collision shape so that can be removed.
TileMap Node as Terrain
Godot node TileMap is main structure upon everything during the gameplay can be builded up. Its cells, represented by an integer, will allow the player or not to dig, build or plant something.
For the sake of simplicity, we are using just three different cells.
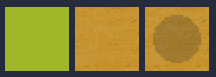
First cell will be “default” terrain chunk, while second and third cell will be dirt where player can plant.
The difference between second and third cell is that the second one is watered one – more about it soon.
In the code as mentioned before, cells are represented as integer where first cell is number 0, second number 1 and third number 3. Player can use hoe only on first cell, the grassy one, in order to transform it into second one, otherwise “hint text” will pop up on the screen stating that hoe can be used only on grassy cells.
Actions and results for all of this nested in different scripts using cells numbers to decide next action or make a break point to prevent player to doing certain action.
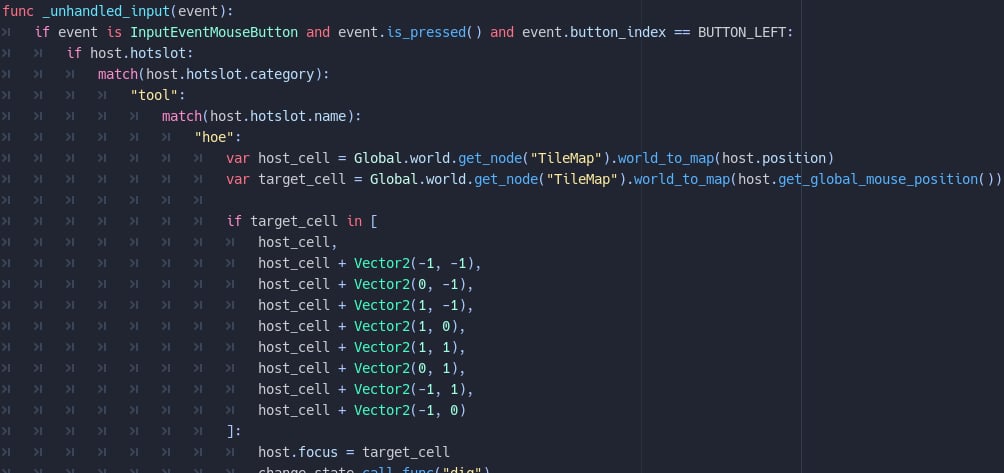
Scripts above shows part of the code from “IdleStatePlayer” which allow the player to trigger dig state if all conditions are true.
See how “if” state is checking whether or not “target|_cell” belongs to the Array of several different cell coordinates.
This array marks all cells around player, or nearby cell – it’s here to prevent player to dig too far away, in other words it’s making sure that player need to walk to the cell in order to cultivate it.
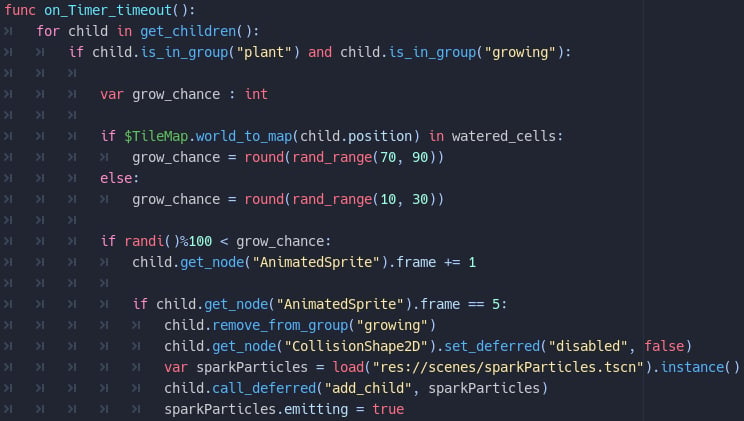
When timer time is up, here is what happens!
First an loop will go through all children’s of world scene, if child is plant there will be initiated grow variable.
This variable is random number which, in case that is higher than 100, will allow plant to transit to another frame – in other word to grow.
By default this grow variable will be randomly setted between 10 – 30 when plant stands on dry tile, cell with integer 1.
However, if plant is instanced on the cell with integer 2 or an wet tile – the number will be setted between 70 – 90.
This provides a much better chance for grow to plants which are standing on tiles that are watered by player using watering tool.
This feature can be further expanded by making unique dictionary for each plant, so that some plants requiers longer period to grow, more wet or dry soil, as well as making them to grow slow or not grow at all during some period of in-game time, like night for example.
World also contains two arrays: “busy_cells” and “watered_cells”.
We are not using this only inside grow function but also to make sure that player can’t grow two seeds on the same tile.
So whenever seed (plant) is instanced – the coordinates of the cell will be added to the array “busy_cells” and if tile itself is watered by the player, it will be added to the array “watered_cells” too.
Later on this coordinates will be removed from the both arrays when plant growing cyclus is ended and its picked up.
However, with a little changes we can make that watered tiles dry over time, making so that player must constantly water down instanced plants.
So when a plant is ripe?!
Plant is ripe when it reaches its last frame in the spritesheet. This will also triggers some stuff!
The plant’s node CollisionShape2D collision will be enabled, allowing player to pick it up, removing it from the world and placing it in the inventory.