For game developers like you and me, getting your game on Steam might seem like a daunting task when you face it for the first time. However, by following a few steps and knowing some tips, the process can be much simpler than you might expect. In the end, everything can be done with effort and time.
If you’re looking to reach a large audience and generate revenue with your game, publishing it on Steam can be an excellent option. This article will outline the critical steps you must take to successfully publish your game on Steam, from setting up your project to the submission process.
About Steam

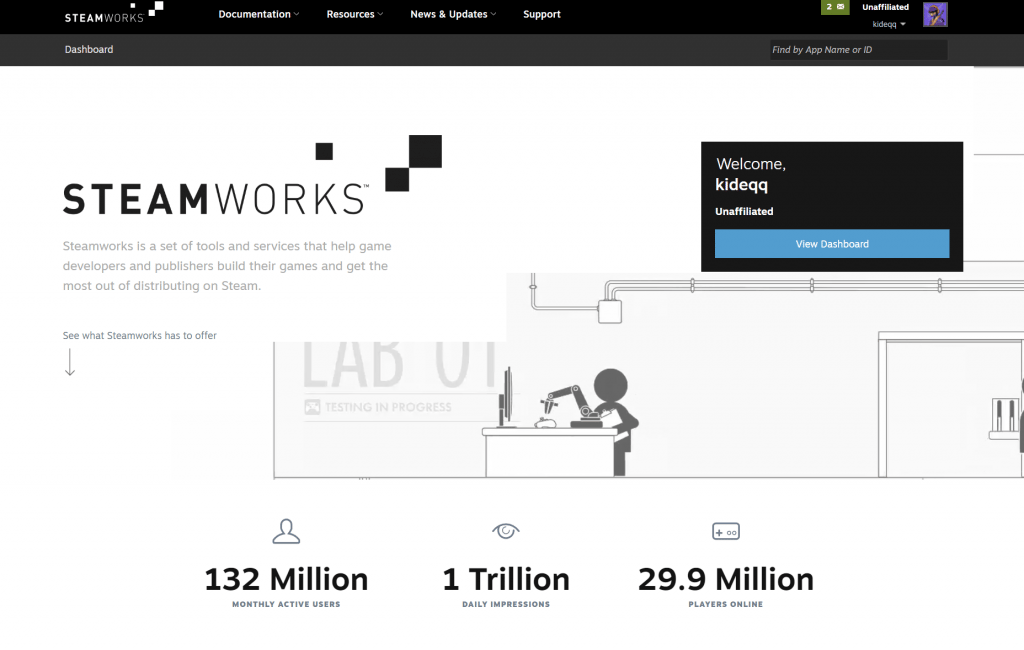
Valve Corporation’s digital distribution platform for video games, Steam has become a powerhouse in the gaming industry since its launch in 2003.
With over 120 million active users, it’s one of the most popular platforms for PC gaming, offering a vast array of games from major AAA titles to indie gems. Not only does allow users to purchase and download games, but it also offers features like game updates, matchmaking, social networking, and more. With its massive user base and comprehensive range of features, Steam is a must-have for any PC gamer.
One of the most exciting aspects is its digital storefront, which gives you as a developer the opportunity to sell your creations directly to fans around the world. Steam’s user-friendly interface allows players to easily browse, purchase, and download new games.
Cost
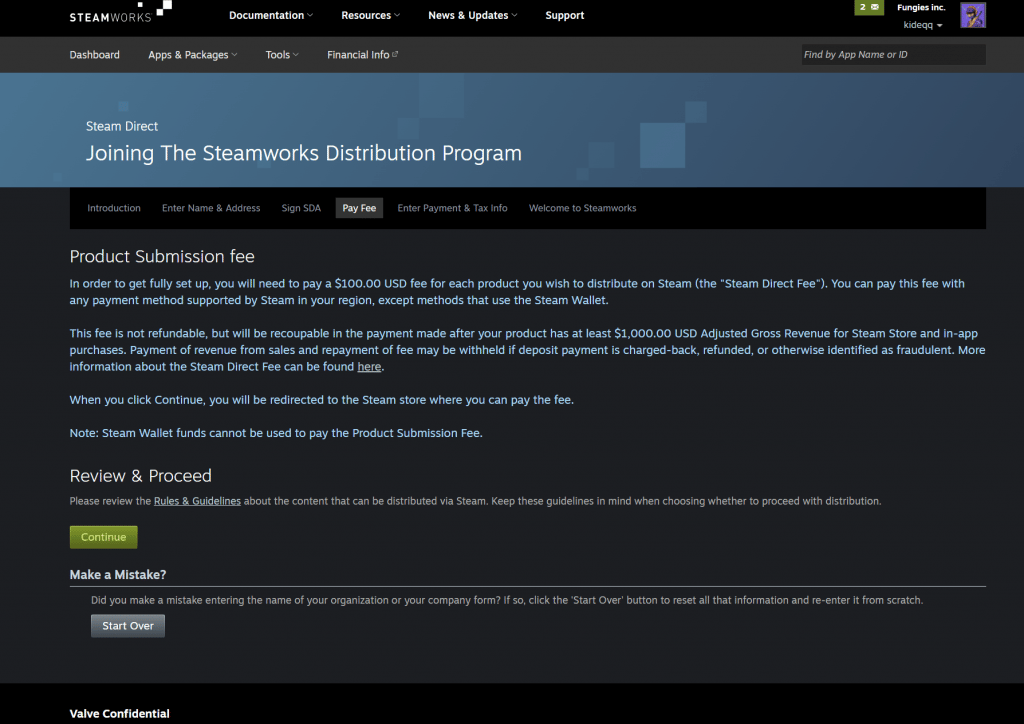
Publishing your game is relatively easy and affordable. You only need to create an account and pay a one-time fee of US$100. As long as your game complies with the Steam Terms of Service, you’ll be able to publish it on the platform. Moreover, offers a unique revenue-sharing model, where they refund the publishing fee if your game earns $1,000 or more in gross revenue from sales on the store.
Commission
When it comes to selling your game, it’s important to keep in mind that Steam takes a 30% commission on every sale made. This means that you’ll receive 70% of the sale price, with the remaining 30% going to Steam.
There are also best practices to follow when creating your store listing. These can include creating an eye-catching trailer, having clear and concise game descriptions, and utilizing screenshots to showcase your game’s features and graphics which I will discuss later.
What Content Is Allowed on Steam?
Steam has clear guidelines on what content is not allowed on its platform. Applications that spam, phish for user data, or violate copyright and laws are strictly prohibited. Additionally, content that exploits children or contains offensive material, such as pornography or hate speech, is strictly forbidden. However, adult content is allowed with appropriate labels and age-gate settings. It’s crucial to ensure that your application meets these guidelines, as each application is manually reviewed.
Requirements and tips
To publish a game, it’s crucial to ensure that it meets the platform’s specific requirements. Prior to starting the publishing process, I highly recommended that you go thoroughly review the Steamworks documentation to ensure that your game meets all necessary specifications.
Technical requirements
For your game to be published on Steam, it must meet specific technical requirements set by the platform. These requirements cover aspects such as minimum system specifications, controller support, and game performance, among others.
To give an example, your game must support the latest version of Windows and be compatible with a wide range of hardware configurations. Additionally, it’s mandatory that games have to be stable and free of major bugs or crashes to ensure a positive user experience.
Content requirements
When it comes to content included in the game published, the platform has strict guidelines in place. These guidelines prohibit certain types of content, such as hate speech, graphic violence, and explicit sexual content.
You need to ensure that the game is appropriate and accessible to a broad audience on the platform. In the end, those requirements help you to create a positive user experience while ensuring that all games published on the platform meet certain standards of quality and appropriateness.
Pricing requirements
You have the flexibility to set your own prices within certain limits, allowing you to experiment with pricing strategies that maximize revenue and attract a broad audience. This system offers various pricing tiers, including free-to-play and paid games.
Choosing the right pricing strategy is crucial. Factors such as the game’s genre, target audience, and perceived value all play a role in determining the optimal price point.
Advertising and marketing
While Steam doesn’t have strict requirements for advertising and marketing your game, you may be transparent and honest in your efforts.
Preparations
Now let’s get our hands on the Unity project!
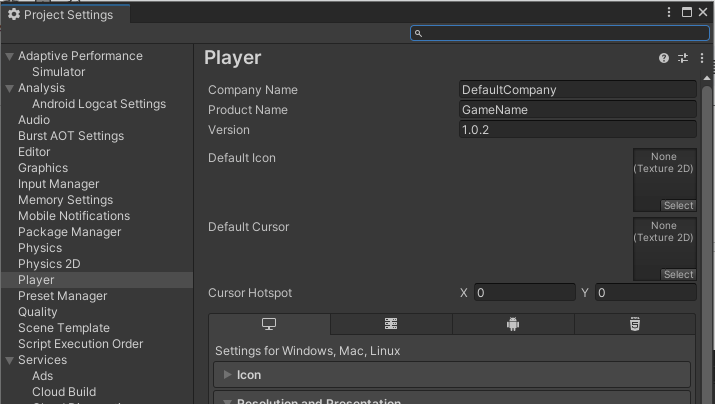
Before you can publish your Unity game on Steam, you’ll need to download and install the Steamworks SDK which provides the tools and resources you’ll need to integrate your game with the Steam platform. Additionally, you’ll need to configure your game’s settings, which include things like setting up your game’s title, description, version, product name, icons, etc.
To do so go to Unity > Project Settings > Player. There you can find all the configurations mentioned above.
Install Steamworks SDK
Steamworks SDK is a set of tools and resources, that allows the integration of various Steam features into the game, such as matchmaking, achievements, cloud storage, and more. The SDK provides APIs, documentation, and other resources to help create and manage the games on the platform. In order to utilize the Steamworks SDK, you must first create a Steamworks account.
Steamworks Configuration
In the Steamworks Application Dashboard, there are two checklists you need to complete in order to publish your game: the Store Presence checklist and the Build checklist. You must submit your app for review in both queues to get it published.
To finish the Store Presence checklist, you’ll need to upload artwork and fill out some forms. However, I won’t be discussing this process in this article. Instead, I will provide an overview of how to implement and integrate Steamworks into Unity, which is essential for publishing your game and getting started with it.
How to integrate Steamworks into Unity
There are two ways to integrate Steamworks into Unity; manually and via the .unitypackage file. The following steps help you guide through the installation via the .unitypackage file which it’s easier to handle.
Now let’s get hands on the job:
- First, you’ll need to import the Steamworks SDK into your Unity project. To do this, open your Unity project and select “Assets” from the main menu. From there, select “Import Package” and choose the “Steamworks SDK” package from the list.
- After you’ve imported the Steamworks SDK, you’ll need to add the Steamworks package to your project. To do this, right-click on the “Assets” folder in the Project window and select “Import Package” > “Custom Package.” From there, navigate to the Steamworks SDK directory on your computer and select the “steamworks.unitypackage” file.
- After you’ve added the Steamworks package to your project, you’ll need to configure the Steamworks settings for your project. To do this, open the “Steamworks Settings” window by selecting “Window” from the main menu, then “Steamworks,” and finally “Settings.” From there, you can configure your game’s settings and API key for Steamworks.
Manually download the SteamManager MonoBehavior which contains a starting point for using the Steamworks API in your project.
Create your first Steamwork script
With Steamworks installed, you can begin using it in your project. To expedite the setup process, I highly recommend using the SteamManager script as your starting point.
Once you have accomplished that, let’s start coding:
- Create script: We’ll create a new script called SteamTest.cs
- Add imports: First, we add using Steamworks;
- Calling method: Then, we add our method call which gets the name of the Steam user like so:
using System.Collections;public class SteamTest : MonoBehaviour {
void Start() {
SteamClient.Init(appID);
if(SteamManager.Initialized) {
string name = SteamFriends.GetPersonaName();
Debug.Log(name);
}
}
}Replace “appID” with your Steamworks App ID, add the script to an empty GameObject, and try it!
Steamworks Callbacks
Callbacks are a crucial element of Steamworks, as they enable you to asynchronously retrieve data from Steam without impeding your game’s progress. For example, GameOverlayActivated_t callback notifies you each time the Steam Overlay is activated or deactivated, as the name implies.
To utilize Callbacks in Steamworks.NET, we can build upon the script we used earlier. You must initially declare a protected Callback<> at the class scope to serve as a member variable that will maintain the Callback.
public class SteamTest : MonoBehaviour {
	protected Callback<GameOverlayActivated_t> m_GameOverlayActivated;
}
Now we generate our Callback by utilizing Callback<>.Create() and assign it to m_GameOverLayActivated. This action ensures that the callback is not destroyed by the garbage collector.
OnEnable is commonly employed for this purpose since it enables us to re-establish the Callback after Unity has reloaded assemblies.
public class SteamTest Script : MonoBehaviour {
	protected Callback<GameOverlayActivated_t> m_GameOverlayActivated;

	private void OnEnable() {
		if (SteamManager.Initialized) {
			m_GameOverlayActivated = Callback<GameOverlayActivated_t>.Create(OnGameOverlayActivated);
		}
	}
}
The last piece is the OnGameOverlayActivated function.
public class SteamTest : MonoBehaviour {
	protected Callback<GameOverlayActivated_t> m_GameOverlayActivated;

	private void OnEnable() {
		if (SteamManager.Initialized) {
			m_GameOverlayActivated = Callback<GameOverlayActivated_t>.Create(OnGameOverlayActivated);
		}
	}

	private void OnGameOverlayActivated(GameOverlayActivated_t pCallback) {
		if(pCallback.m_bActive != 0) {
			Debug.Log("Steam Overlay has been activated");
		}
		else {
			Debug.Log("Steam Overlay has been closed");
		}
	}
}
That concludes the setup!
I suggest the utilization of the GameOverlayActivated Callback to pause the game when the overlay becomes active.
Steamworks CallResults
There is another important aspect that this article will cover, which is CallResults. CallResults are comparable to Callbacks in that they allow for asynchronous data retrieval from Steam. However, they differ in that they are the result of a specific function call rather than a global event sink-like Callbacks.
You can identify a function that provides a CallResult by examining its return value. If it returns SteamAPICall_t, then you must establish a CallResult.
In Steamworks.NET, configuring a CallResult is almost identical to setting up Callbacks. Initially, we declare a CallResult<> at the class scope to serve as a member variable.
Following this, we can establish our CallResult by employing CallResult<>.Create. As before, we perform this action in OnEnable to ensure that it is reinitialized whenever Unity reloads the assemblies.
public class SteamTest : MonoBehaviour {
	private CallResult<NumberOfCurrentPlayers_t> m_NumberOfCurrentPlayers;

	private void OnEnable() {
		if (SteamManager.Initialized) {
			m_NumberOfCurrentPlayers = CallResult<NumberOfCurrentPlayers_t>.Create(OnNumberOfCurrentPlayers);
		}
	}
}
Once more, we generate our function, which is invoked asynchronously. The function signature of a CallResult is slightly distinct from a Callback, as it includes bool bIOFailure.
public class SteamTest : MonoBehaviour {
	private CallResult<NumberOfCurrentPlayers_t> m_NumberOfCurrentPlayers;

	private void OnEnable() {
		if (SteamManager.Initialized) {
			m_NumberOfCurrentPlayers = CallResult<NumberOfCurrentPlayers_t>.Create(OnNumberOfCurrentPlayers);
		}
	}

	private void OnNumberOfCurrentPlayers(NumberOfCurrentPlayers_t pCallback, bool bIOFailure) {
		if (pCallback.m_bSuccess != 1 || bIOFailure) {
			Debug.Log("There was an error retrieving the NumberOfCurrentPlayers.");
		}
		else {
			Debug.Log("The number of players playing your game: " + pCallback.m_cPlayers);
		}
	}
}
The last step involves calling a function that returns the CallResult and then linking the SteamAPICall_t handle that it returns with our CallResult.
public class SteamTest : MonoBehaviour {
	private CallResult<NumberOfCurrentPlayers_t> m_NumberOfCurrentPlayers;

	private void OnEnable() {
		if (SteamManager.Initialized) {
			m_NumberOfCurrentPlayers = CallResult<NumberOfCurrentPlayers_t>.Create(OnNumberOfCurrentPlayers);
		}
	}

	private void Update() {
		if(Input.GetKeyDown(KeyCode.Space)) {
			SteamAPICall_t handle = SteamUserStats.GetNumberOfCurrentPlayers();
			m_NumberOfCurrentPlayers.Set(handle);
			Debug.Log("Called GetNumberOfCurrentPlayers()");
		}
	}

	private void OnNumberOfCurrentPlayers(NumberOfCurrentPlayers_t pCallback, bool bIOFailure) {
		if (pCallback.m_bSuccess != 1 || bIOFailure) {
			Debug.Log("There was an error retrieving the NumberOfCurrentPlayers.");
		}
		else {
			Debug.Log("The number of players playing your game: " + pCallback.m_cPlayers);
		}
	}
}
For both Callbacks and CallResults, it is necessary to regularly call SteamAPI.RunCallbacks.
SteamManager
The SteamManager script is known as the ‘user-mode’ portion of Steamworks. It offers basic logic to configure and maintain the connection with Steam and serves as a reasonable starting point for you to expand upon. You will need to modify the SteamManager script to suit your needs, and comprehending its operation is a vital aspect of completely mastering Steamworks.
The SteamManager script relies on being created once and persisting throughout the duration of the game. This involves some rather heavy logic to integrate with Unity’s GameObject system.
With this pattern, you can use the SteamManager from any scene in your game without having to manually place a SteamManager GameObject in each one. As usual, refrain from interacting with the SteamManager from Awake() or OnDestroy() in other scripts as the executive order is not guaranteed.
The build
In order to publish your game on Steam, you need to upload the game build using the Steam SDK and SteamCMD.
Once you have completed your checklists, your store and product build the game will be reviewed by Valve before you can release it. Also, you will need to click “Mark as ready for review” to inform Valve that you are ready for a review of your store page and pricing. This review process can take up to five days.
Options
To upload a build to Steam, you have two options available: using the Web interface to upload ZIP files or using the SteamPipe CLI utility.
The Web interface has a limitation on upload size, allowing only up to 2048MB. Additionally, if an error occurs during the upload process, the interface won’t display any error information. In such cases, it’s recommended to use SteamPipe, which provides extended logs to help troubleshoot any issues that arise.
While SteamPipe is supposed to work on both Mac and Windows, it may not be easy to run on a Mac. However, it’s worth trying as your experience may differ.
There seems to be an issue uploading macOS apps using SteamPipe, in which the certification and notarization can get lost during the process. If you encounter any problems and your app becomes unrunnable when uploaded via SteamPipe, consider using the Web interface instead.
What is Steampipe
Steampipe is a handy tool that helps you work with data from different cloud services like AWS, Google Cloud, and Microsoft Azure. This tool uses a powerful database system called PostgreSQL to help you ask questions and analyze data. It’s easy to use and helps you find the information you need all in one place. Also, you can ask questions about your cloud infrastructure data to help with things like reporting, security, and saving money. It also helps you automate some of your work so you can focus on other things.
I recommend taking a look at how to implement Steampipe documentation.
Step by Step Guide
Uploading a game to Steam Store as an indie developer can be a daunting task, but with the right guidance, it can be a seamless process. This step-by-step guide will walk you through the process of uploading your game to the Steam Store, from account creation to launching your game.
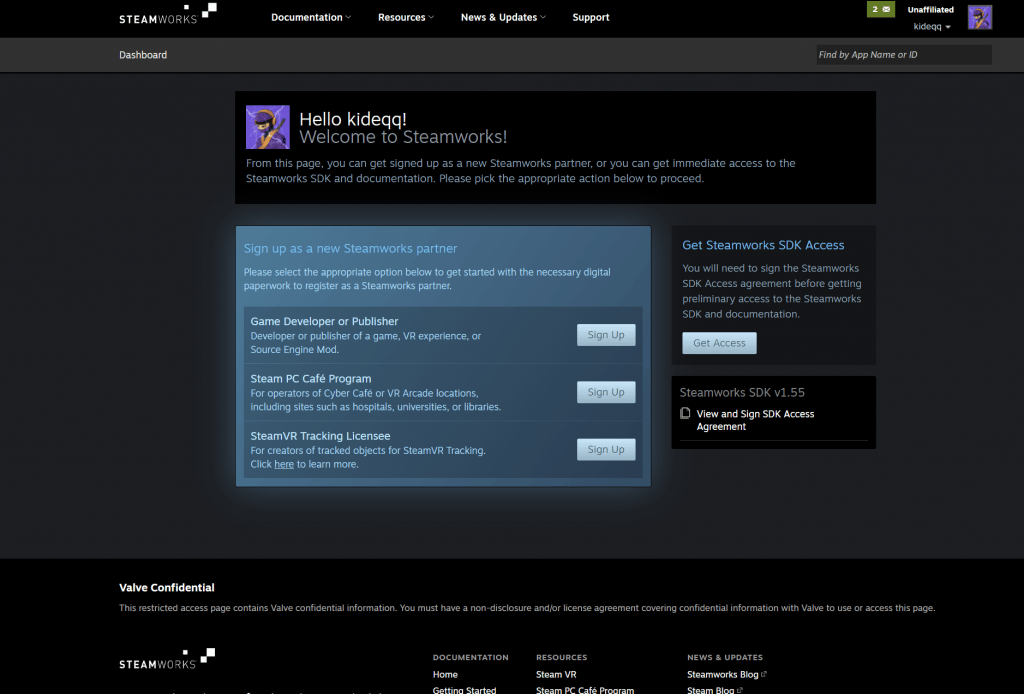
Step 1: Create a Steamworks Account
The first step is to create a Steamworks account. Steamworks is the set of tools and services provided by Valve, the company behind Steam, that enables developers to publish their games on the Steam platform. To create an account, visit the Steamworks website and click on the “Register” button.
Step 2: Prepare Your Game for Steam
Before you can upload your game to Steam, you need to prepare it for the platform. This includes ensuring that it meets Steam’s technical requirements, creating a build of the game that can be uploaded to Steam, and creating promotional materials such as screenshots and videos.
Step 3: Create a Steam App ID Once your game is ready to be uploaded to Steam, you need to create a Steam App ID. This ID is a unique identifier for your game on the Steam platform, and it will be used to track sales, update the game, and more. To create an App ID, log in to your Steamworks account and click on the “Apps” tab.
Step 4: Set Up Your Game’s Store Page
After creating your Steam App ID, you need to set up your game’s store page. This is where potential customers will go to learn more about your game and purchase it. To set up your store page, log in to your Steamworks account and click on the “Store Presence” tab.
Step 5: Upload Your Game Build
Once your store page is set up, you can upload your game build to Steam. This is the file that customers will download when they purchase your game. To upload your game build, log in to your Steamworks account and click on the “Depots” tab.
Step 6: Set Up Pricing and Distribution
After uploading your game build, you need to set up pricing and distribution for your game. This includes choosing the price of your game, selecting the regions where it will be available, and choosing whether to sell it as a standalone game or as part of a bundle. To set up pricing and distribution, log in to your Steamworks account and click on the “Packages” tab.
Step 7: Submit Your Game for Review
Once you have completed all of the above steps, you can submit your game for review by Steam. This process can take several days or even weeks, depending on the volume of submissions that Steam is receiving at the time. To submit your game for review, log in to your Steamworks account and click on the “Publish App” tab.
Step 8: Launch Your Game on Steam
After your game has been reviewed and approved by Steam, it’s time to launch it on the platform. This is the moment you’ve been working towards, so be sure to promote your game on social media, gaming forums, and other channels to maximize its exposure.
Uploading a game to Steam Store as an indie developer may seem daunting, but following these steps can help make the process smoother. From creating a Steamworks account to launching your game on the platform, each step is important for a successful launch. Be patient and persistent, and remember that the hard work you put into creating your game is just the beginning of the journey.