Learn the basis of a proficient platformer controller!
Unity is a powerful game engine that can save you a lot of time and effort when creating your game, but it also has some problems when it comes to the default physics it provides. Getting the physics just right can be a challenge, but it’s crucial for creating a game that feels amazing and different in the actual market that is overbooked (but that’s another topic).
This article aims to help you along your way in creating a custom physics movement controller explaining in detail all the concepts needed and providing some tips and tricks to improve the movement in your game made with Unity.
Game References


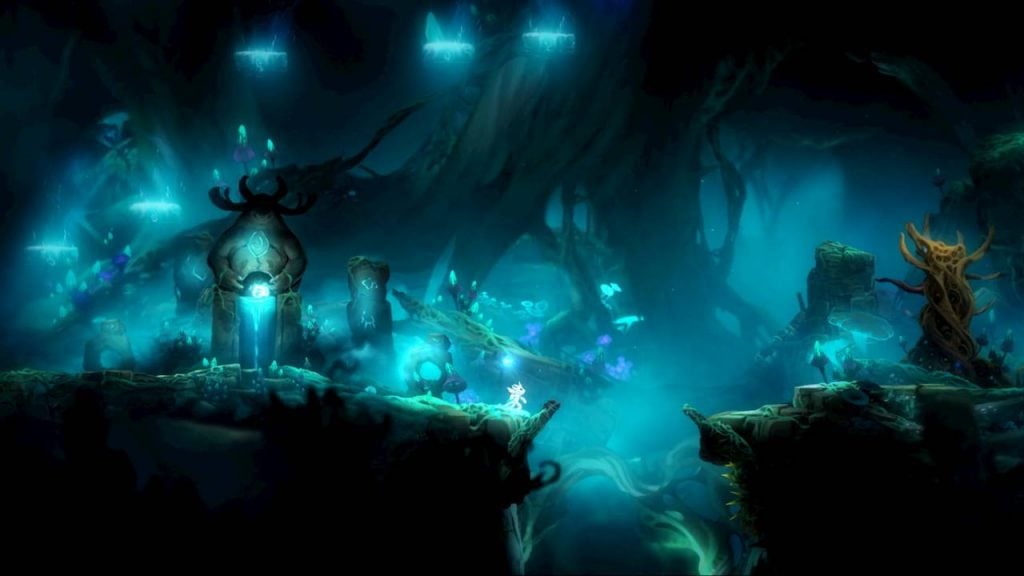
In my opinion, games such as Super Meat Boy, Celeste, The King’s Bird, and Dead Cells represent the gold standard for 2D movement mechanics. These games have achieved this status by creating satisfying and intuitive movement mechanics that are centered around simple directional movement and satisfying jumps. They are excellent platformers because they use a variety of invisible tricks in their physics systems to create the illusion of tight controls. These tricks are crucial in ensuring that the player’s movements feel natural and responsive enhancing the overall gameplay experience.
All of the games mentioned have invested significant time and effort into perfecting the gameplay mechanics, particularly in regard to the way the player gains and relinquishes control of their character. These subtle tricks can go unnoticed by casual gamers, but they are crucial to the overall experience and are appreciated by those who put in the effort to master the game. The developers of these games have dedicated themselves to honing the details that make their games stand out, and this attention to detail is what sets them apart from other games in the genre. It is a testament to the hard work and creativity of the developers that these games have become beloved by fans and continue to be celebrated as examples of exceptional gameplay design.
Unity physics versus Custom physics
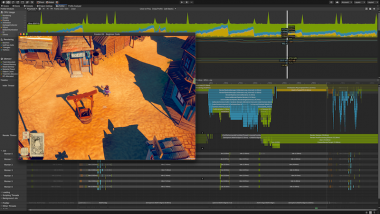
When creating 2D movement controllers the default physics system does not always replicate real-life attributes perfectly. As a developer, you may find that the controller behaves in ways that are not entirely within your control. The features provided by Unity are managed by the engine, which means that developers do not have direct access to modify the source code and may not have complete control over the physics system.
This limitation can be frustrating, especially when attempting to create polished gameplay mechanics. However, despite these challenges, there are many resources and articles available to indie developers that can help them overcome these limitations and create satisfying and responsive 2D movement controls within the Unity engine.
In this article, we won’t talk about how to use the Unity system physics but explain all the concepts needed for a custom physics system.
Unity Physics System
It’s important for those who are new to creating 2D movement systems in Unity, that is recommended to start with the built-in physics engine and gain a basic understanding of how movement works within the Unity environment. Unity Physics is a fundamental aspect of game development that allows objects to be influenced by real-world forces such as gravity, velocity, and acceleration.
Once you have a grasp of the underlying principles of physics within Unity, you can begin to create your custom system that is tailored to your specific needs and gameplay mechanics.
By building on a foundation of physics knowledge, you can create movement controls that feel natural and responsive, enhancing the overall player experience. Whether you choose to use the built-in physics engine or develop a custom physics system, having a strong understanding of the underlying principles of physics is essential for creating successful 2D movement controls in Unity.
Custom Physics
Developing custom physics allows you to create a specific movement feeling that is tailored to the game’s unique mechanics. Developers have greater control over the movement and interaction of characters within the game environment. This control also allows for more efficient bug fixing and the addition of new features, as every aspect of the physics system can be carefully tuned and modified as needed. Also, allows indie developers and designers to experiment with new gameplay mechanics, which can lead to a more engaging and immersive player experience.
While developing the system may require a greater investment of time and resources than using a pre-existing physics engine, the added control and flexibility it provides can be well worth the effort for those who are committed to creating a truly exceptional gaming experience.
However, these systems are enhanced with more advanced features written in C#, such as delegates and structs, which help to improve the overall performance and efficiency of the character controllers. While these more advanced features are not strictly necessary for creating a good character controller, they do contribute to a smoother and more responsive gameplay experience.
Hidden tricks: Features you need to know for your custom movement physics system.
This is where things get cool. While terms like “Coyote” may seem unfamiliar or unusual, they play an important role in the development of a successful platformer game. By implementing concepts and other invisible physics tricks (explained below), you can create a character controller that feels tight and responsive, enhancing the overall gameplay experience for your players.
With a bit of experimentation and a solid understanding of the underlying principles of movement physics, even novice game developers can create their own custom character controllers and physics systems that stand out in a crowded gaming market.
The Run
Let’s go back to the beginning and look at the most basic concept: the run. A character’s run can be split into three parts: acceleration, top speed, and deceleration.
- Acceleration: How long it takes to reach the top speed.
- Top speed: Max movement speed.
- Deceleration: How long it takes to stop.
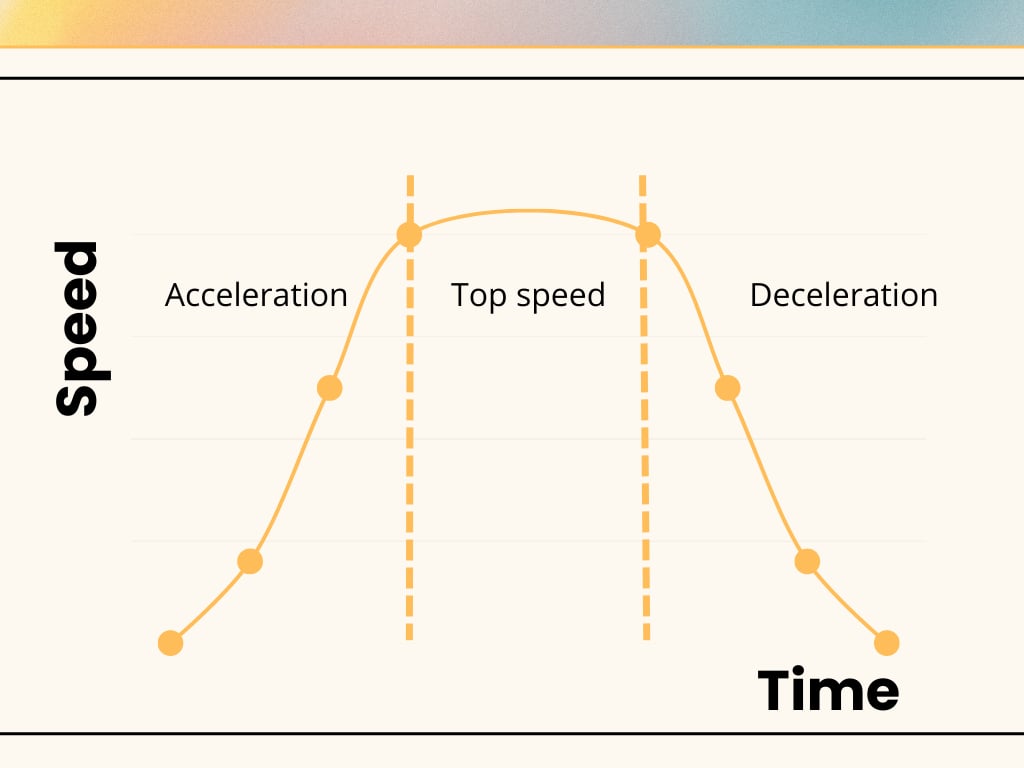
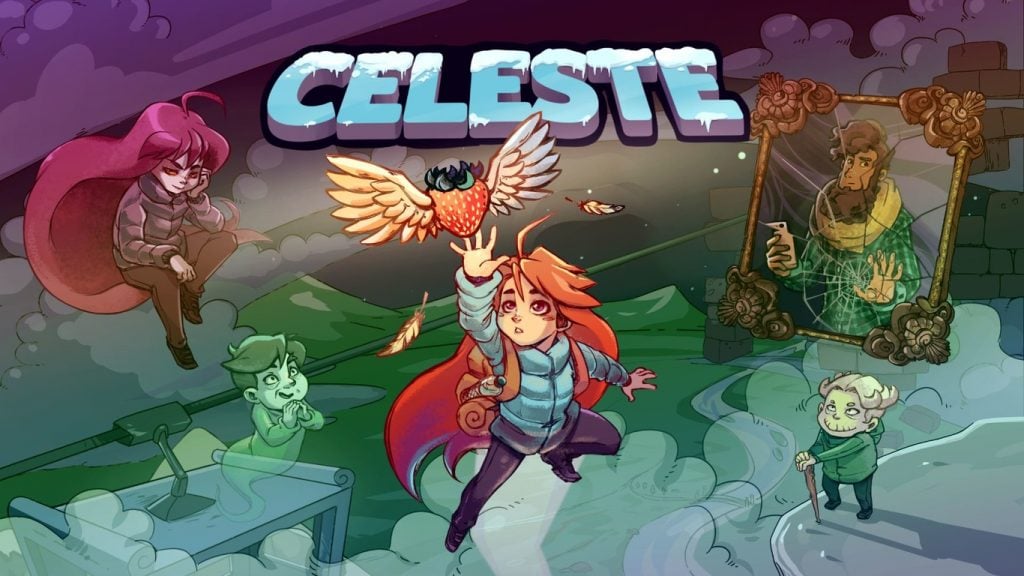
It is crucial to get the acceleration and deceleration right when it comes to movement in your game, as it greatly impacts the overall feel. If the acceleration and deceleration values are too small, the character may feel rigid and robotic. Conversely, if they are too high, the character may feel heavy and difficult to control, as seen in Super Meat Boy or Super Mario Bros U.
For example, in the case of Celeste, it takes six frames to reach full speed, which is four times faster than Super Meat Boy, and three frames to stop, which is nine times faster than Super Mario Bros U.
The Jump
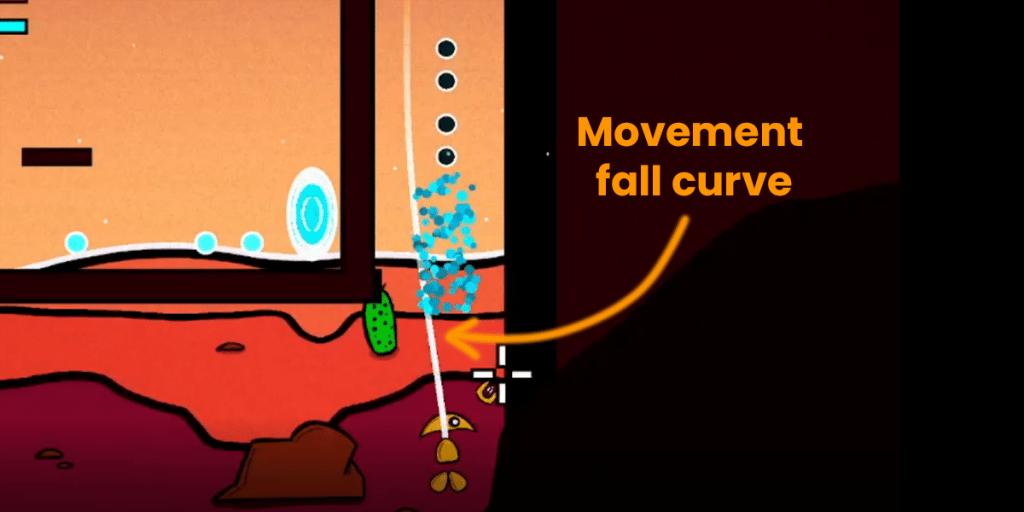
Let’s get into the jump section. To create a satisfying jump for a character in a game, we need to consider various factors, including the character’s body size and the desired jump height. We must design the jump curve to ensure a smooth and natural motion (Look at Figure 1.0.1). This curve should include concepts such as gravity, apex modifiers, and jump apex height to achieve the desired effect. By carefully crafting the jump curve, you can create a jump that feels both realistic and enjoyable for the player.
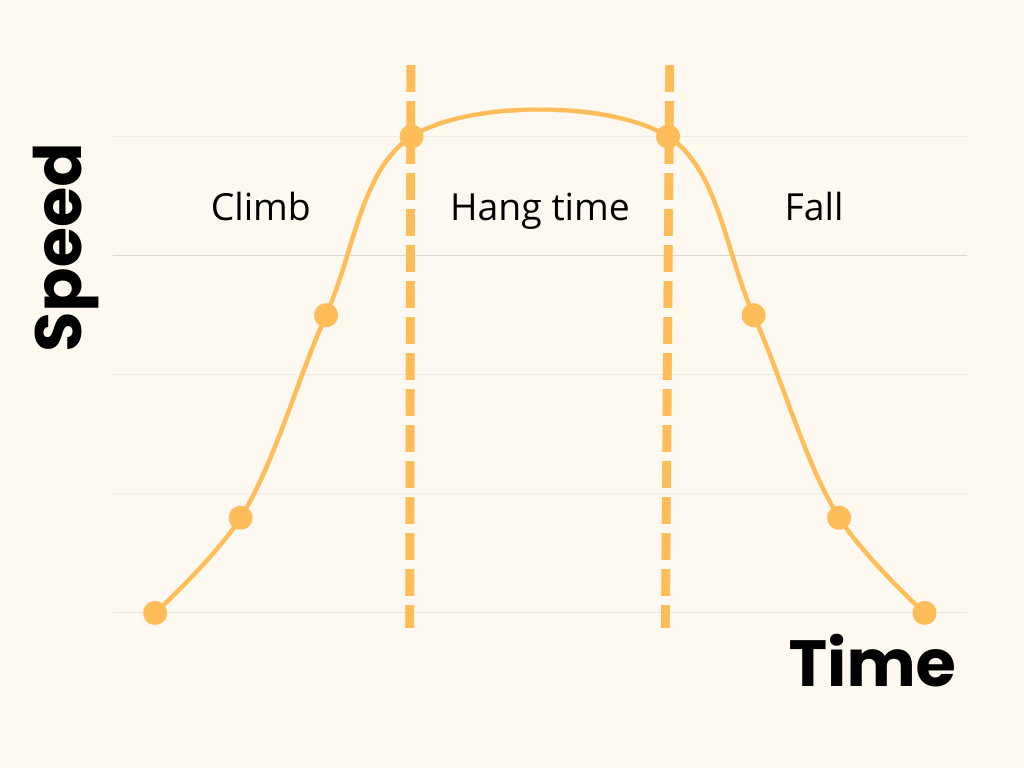
- Climb: How long it takes to reach the top height.
- Hang time: Apex of the jump.
- Fall: How long it takes to hit the ground.
Those concepts provide us with the total jump time, but as previously said they are not the only aspects that contribute to creating a satisfying jump feeling.
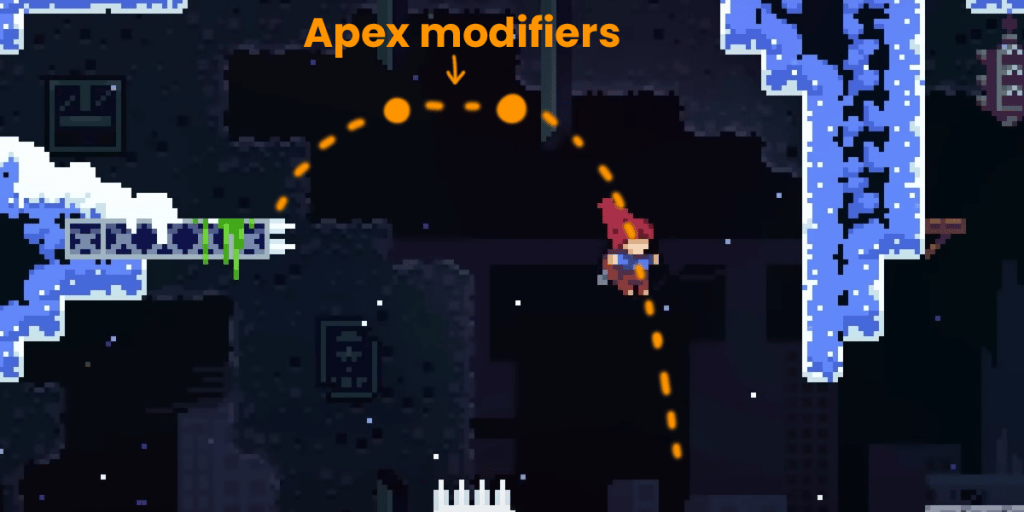
Variable jump height and apex modifiers
Giving the player control over the height of the jump is important for a good jump feeling. One way to achieve this is by implementing an early jump release feature, where additional downward force is applied to the character when the player releases the jump button. This simple trick allows for greater control and precision in jump mechanics.
At the highest point of our jump, we can add anti-gravity movement and a slight speed boost using apex modifiers. Apex modifiers refer to the changes in movement that happen at the peak or apex of a jump. At this point, the character experiences a moment of weightlessness or anti-gravity that allows them to move differently from the rest of the jump. By modifying the character’s speed or movement during this brief period, you can create a more dynamic and interesting jump that feels more responsive and satisfying for players.
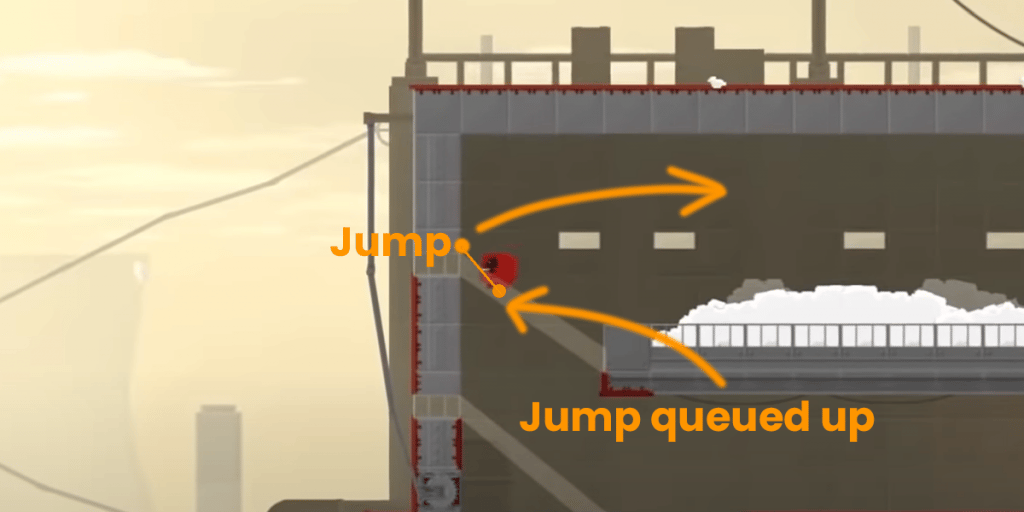
Jump buffering and coyote time
Jump buffering is an essential feature of a good controller that allows the player to queue up the next jump before actually hitting the ground. Neglecting this feature can make the player feel frustrated if they press jump but the character doesn’t jump when they want it to. This feature is particularly implemented in those games where the movement is really precise.
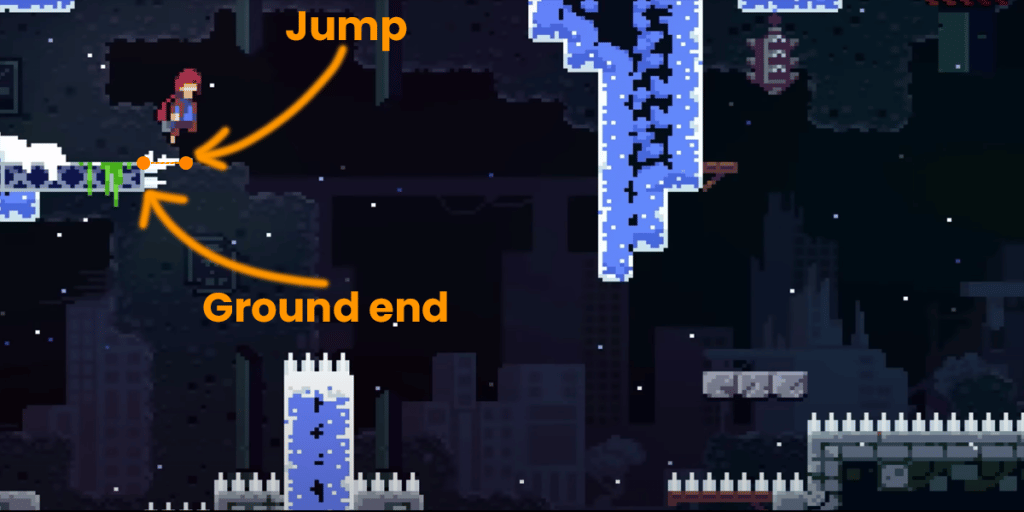
There comes the one I like the most: Coyote time. Coyote is a mechanism that enables the player to jump even after leaving a platform, for a few milliseconds. This is achieved by tracking when the character becomes airborne and verifying if the jump button was pressed within the coyote time threshold. It’s a crucial feature in creating a satisfying platformer experience for the player.
Clamped fall speed
Without setting a maximum falling speed, the character falls uncontrollably, making it difficult for the player to move the character based on their inputs. This loss of control during the fall can lead to a poor user experience. By clamping the falling speed to the appropriate level, it becomes easier to dodge or land on platforms. Moreover, it enables the design to incorporate falling as a key mechanic in the game.
The Edges
Edge detection is a crucial component of a physics controller, as it directly affects how the character behaves in the game. Typically, collision edges are detected through raycasting, which detects objects that have been designated as ground with attached colliders.
To implement edge detection in Unity, you will need to ensure that the ground and static objects in your game environment have colliders attached to them, which will enable the raycasting to work properly.
Raycasts
Here comes a crucial point Raycasts. They are an important feature in Unity that allows you to detect collisions between objects in your game. To use raycasts, you must specify a starting point, a direction, and a distance for the ray. The ray is then cast from the starting point in the specified direction for the given distance.
You may attach a script to a game object in Unity to perform raycasting. In the script, you define the parameters for the raycast and choose what types of objects to detect collisions with. This can be done using layers or tags. When you call the raycast function in your script, Unity will check for any collisions between the ray and objects in the scene that match your criteria. If a collision is detected, you can perform various actions, such as triggering events or applying forces to the objects involved. Raycasts are a essential tool for creating complex interactions between objects in your Unity game.
Here is an example of use:
// Cast a ray straight down.
        RaycastHit2D hit = Physics2D.Raycast(transform.position, -Vector2.up);

       // If it hits something...
        if (hit.collider != null)
        {
            // Calculate the distance from the surface and the "error" relative
            // to the floating height.
            float distance = Mathf.Abs(hit.point.y - transform.position.y);
            float heightError = floatHeight - distance;

           // The force is proportional to the height error, but we remove a part of it
            // according to the object's speed.
            float force = liftForce * heightError - rb2D.velocity.y * damping;

           // Apply the force to the rigidbody.
            rb2D.AddForce(Vector3.up * force);
        }
Edge detection
This part probably it’s the most difficult part (at least it was for me). When colliding with a corner and subsequently falling to the ground, the player is gently nudged in the direction of their movement. Similarly, when hitting a platform with their feet, the player experiences a slight nudge. Additionally, if the player attempts to jump onto a ledge but misses it by a small distance, the controller provides some leniency and nudges the player upwards. This is achieved by applying a brief nudge in the opposite direction for a few frames while maintaining horizontal movement.
Conclusion
In conclusion, there are a lot of concepts and features that you need to implement to have a good movement feeling for your game with custom physics. You may understand them and play with them. Whether to use the Unity Physics System or custom physics largely depends on the specific requirements of the project.
For simpler games or applications, the built-in Unity Physics System may provide all the necessary functionality with minimal setup and maintenance. The Unity Physics System is designed to be easy to use and requires minimal setup to get started.
While Unity’s physics system is robust and can handle a wide range of interactions and collisions, there may be cases where using custom physics can provide more control and fine-tuning for a specific game or application. Here are some reasons why you as an indie developer might choose to use custom physics instead of the Unity physics system:
- Performance: Unity’s physics system can be resource-intensive, especially in complex scenes with many interacting objects. Using custom physics can sometimes be more efficient and optimized for a particular use case.
- Flexibility: Unity’s physics system provides a set of rules and constraints that may not always be suitable for a particular game or application. Using custom physics allows developers to create their own rules and constraints that are tailored to their needs.
- Specialized Interactions: Some games or applications may require specific types of interactions that are not easily achievable with Unity’s physics system. Using custom physics can provide more specialized and nuanced interactions that fit the unique requirements of the project.
- Consistency: Unity’s physics system can sometimes produce unpredictable or inconsistent results, especially when dealing with complex interactions. Using custom physics can help ensure more consistent behavior across different platforms and devices.
Moreover, you can combine both of them and only use custom physics for your movement.
And that’s it! Hopefully, this has been helpful to you, and you have learned new concepts. 🙂